People seem to think that hugelkultur gardening is a mysterious and complicated system of gardening. But it really isn’t. And there are many ways to incorporate the use of wood in a permaculture garden.
The first permaculture garden I built was done with trenches, about 5 feet deep, filled with logs and branches. I did it this way because our soil was basically sand, and I wanted to build soil. I used logs, wood chips and green material. You can read about it here.
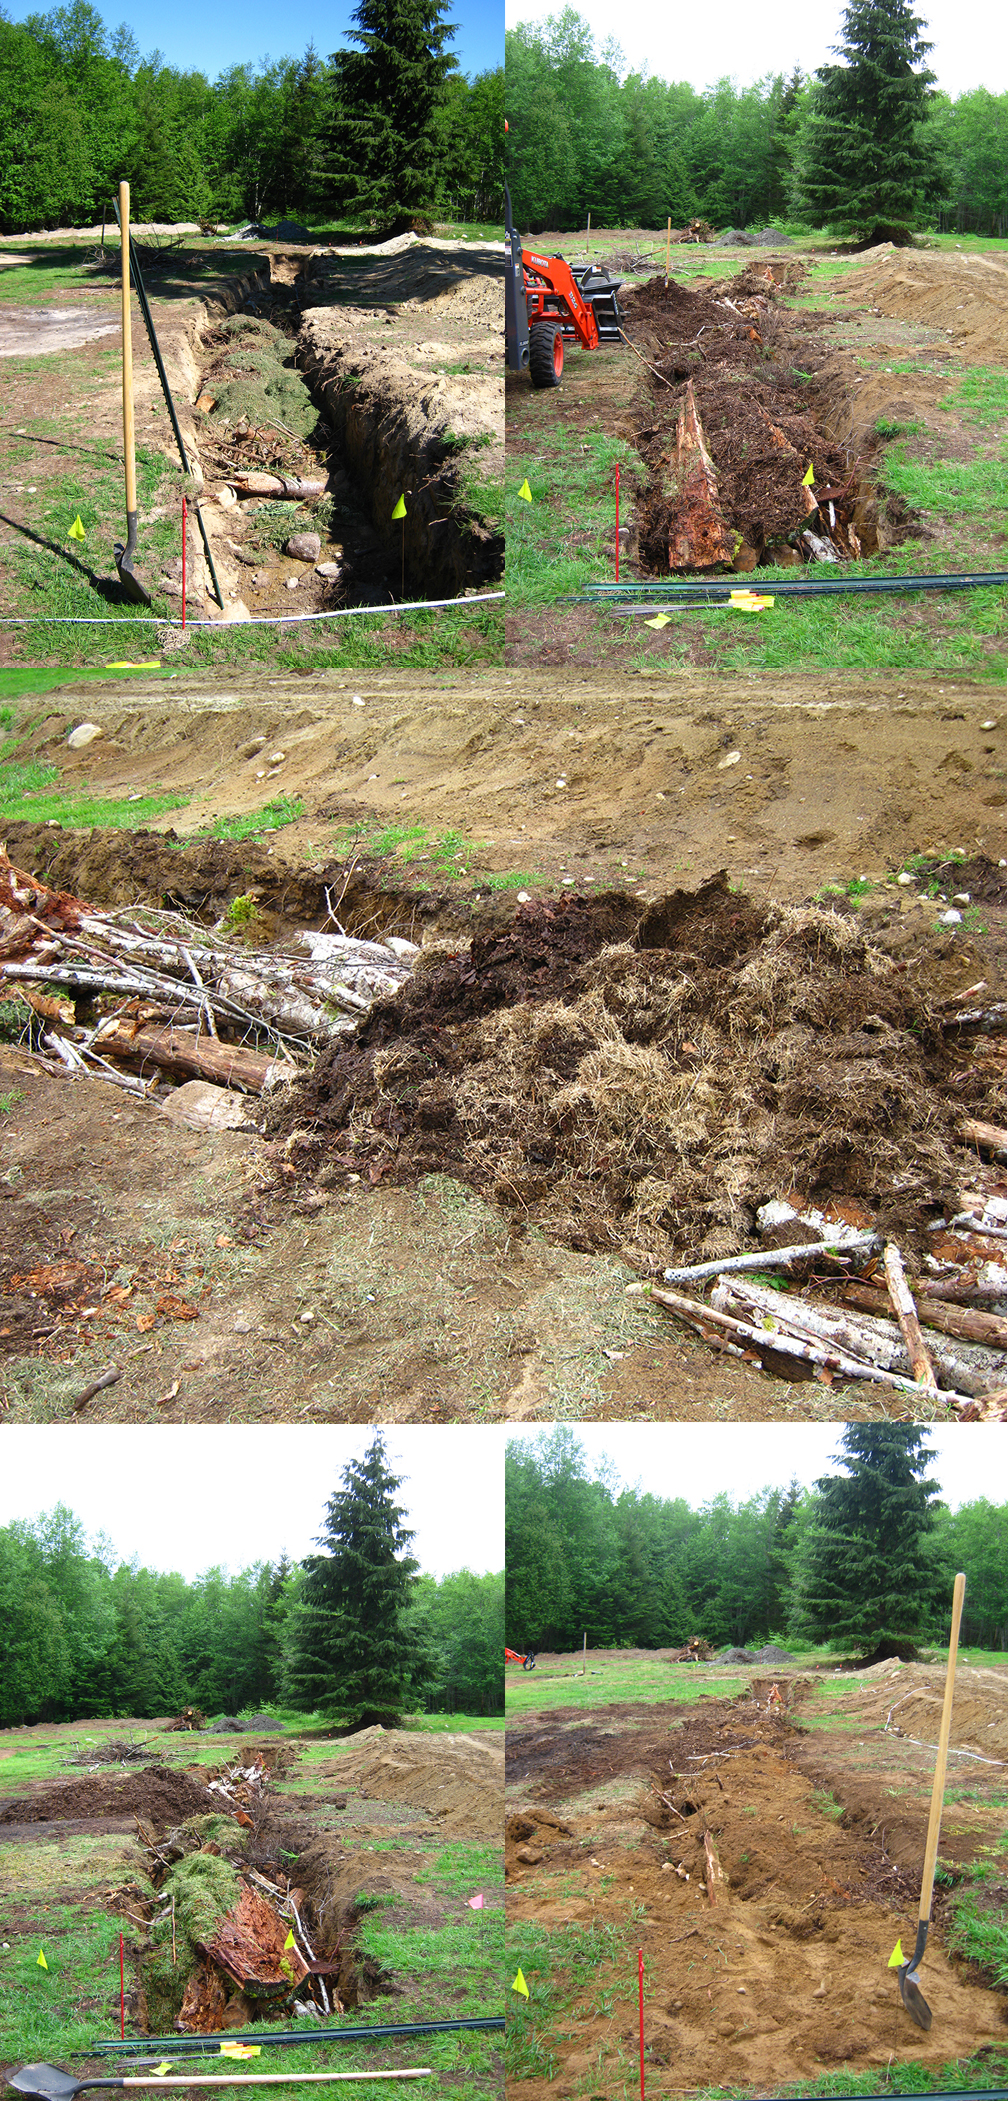
The garden I built last year is shallow trenches – about a foot deep – with a layer of large old logs and branches, topped with organic matter.
The soil in this garden is much better than the last one I built (although somewhat sandy) and the use of wood is more for water retention, and to create raised beds.
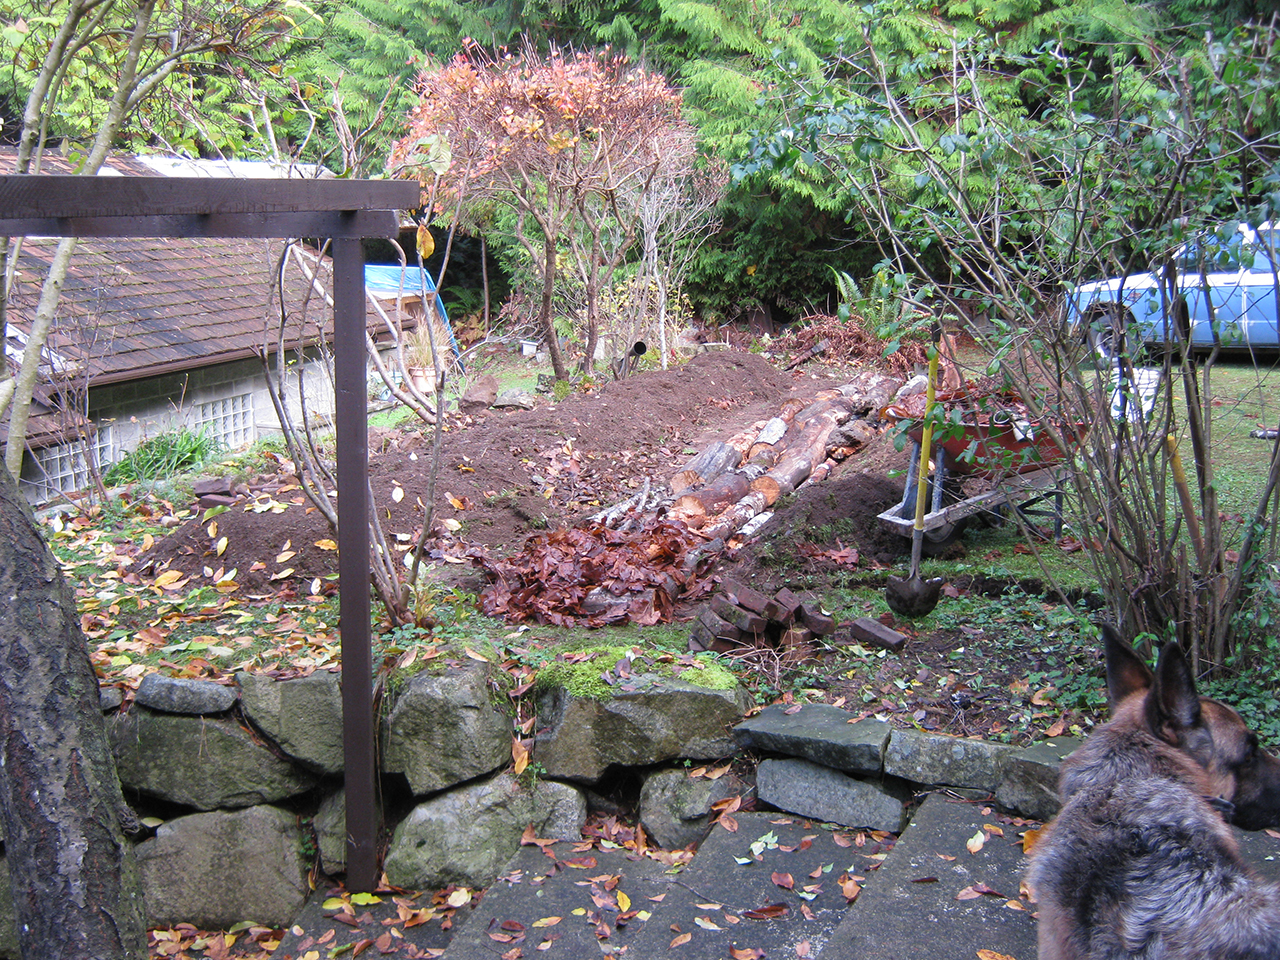
The benefits of hugelkultur
Hugelkultur proper is the placing of the logs on top of the soil, and covering it with more soil. In this instance, you can build quite tall beds; and it is recommended to put layers of soil between the layers of logs if you are going to build it more than a couple of feet tall.
This process will create a large living organism, rife with life – microorganisms galore, fungi and mushrooms, and all manner of tiny helpers. The wood soaks up water, and by the third year you’ve got a very resilient, drought resistant, fertile place to grow your vegetables.
Hugelkultur beds can be as tall as 7 feet, and as long as you want them to be. There are quite a few benefits to a very tall raised bed.
One benefit is that a 7-foot hugelkultur greatly expands your gardening space. If a bed is 6 feet wide and 10 feet long, it will give you 60 square feet of garden space. BUT, if it is 6 feet wide, 10 feet long, and 7 feet tall, you’ve created 140 square feet of growing space. Subtract 60 from that, and you have gained 80 feet of growing space. That’s a lot of veggies!
Another benefit of a very tall garden bed is the microclimates it creates. The side that gets the most sun is the place to grow sun loving plants, and the side that gets more shade can grow plants that prefer shade, or cooler temperatures.
What kind of wood should I use?
The question I see the most regarding hugelkultur is, “What kind of wood can I use?” People seem to be afraid to try, in case they get it wrong. But here’s the thing – you probably won’t.
But there are a few rules of thumb:
- Fresh wood will take longer to break down than old wood.
- Hard woods will also take longer to break down.
- Cedar wood is best used only if it is really well aged, as it takes very long to break down, and could exude substances that inhibit plant growth.
- It seems that trees that inhibit plant growth when they are growing, could possibly do the same in a hugelkultur situation. So you could include black walnut in that scenario as well.
I think the key is to use any suspect trees only in a well aged form – meaning, they are already breaking down and falling apart. This is most likely to make your hugelkultur bed safe for planting in. If you have any doubts, just use a small amount, and put it at the bottom of the pile.
I used alder, fir, old cedar, and hemlock in my first garden bed, and had no problems. Most was well aged, but there were some fresh alder logs in there as well. In my current garden, I used almost exclusively old alder, although there are a few branches of other species in there – probably fir.
So, like all things gardening, my advice is to go for it! Pile up those logs, throw on some soil, and plant a garden. Experiment in small areas with types of wood that you’re not sure of, and just see what happens.
It is our experimentation, and sharing of information with others, which will lead this technique of gardening forward, and help people to build these low-cost, resilient gardens.
Different kinds of hugelkultur
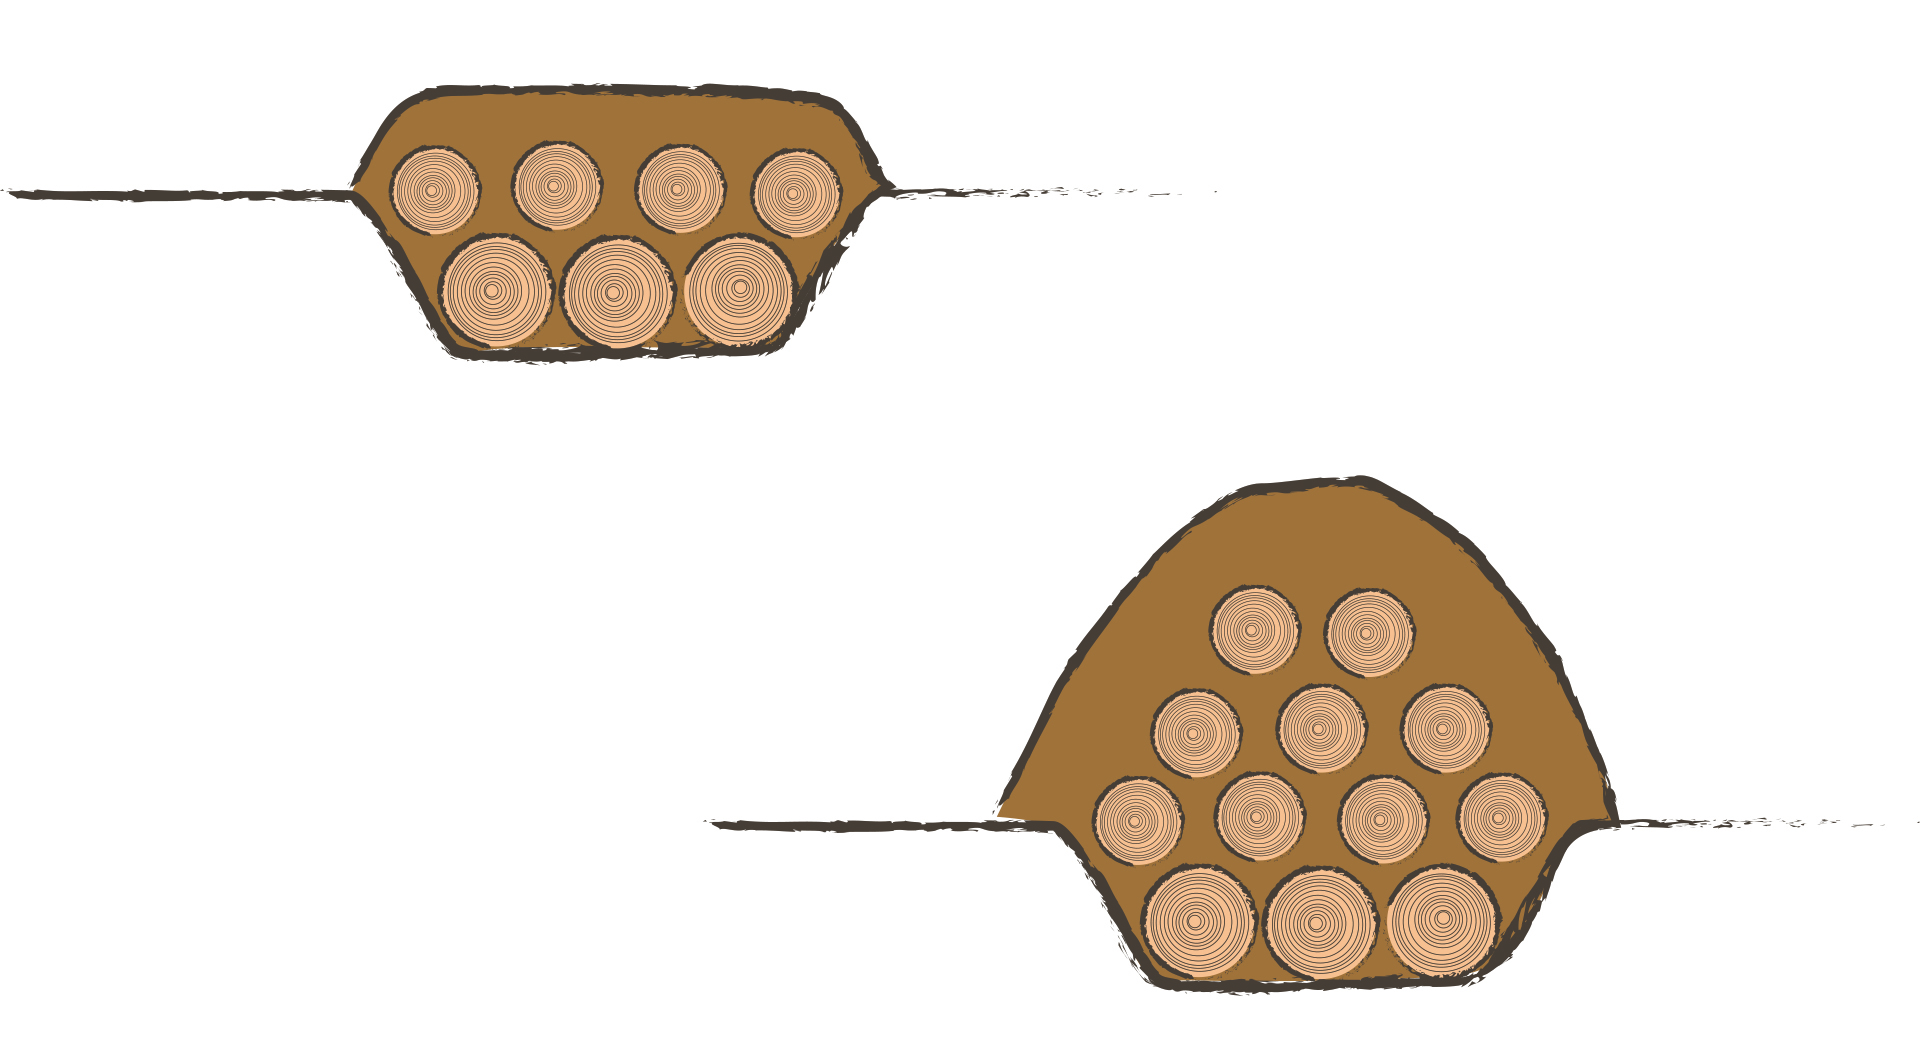
So, piling up logs and covering them with soil is one way to incorporate the benefits of hugelkultur into your garden build; but there are other ways to use wood in the garden.
Digging deep trenches and filling them with wood for my first garden was great because I had no real soil, and had not been there long enough to build up lots of compost. It was the quickest way to start building soil, and get a garden going quickly.
I also really liked the idea of building a resilient garden that would require less water as time went on; and would produce much of its own fertility.
But people have used the theory of hugelkultur to build beds of all shapes and sizes. As long as the wood is well covered, and you top it with enough soil to grow plants, it will work. Of course, the smaller the beds, the less water they will hold; but they will still be an improvement over regular beds.
The bigger the hugelkultur, the longer it will last before the wood breaks down completely. You might want to rebuild it eventually – but not for at least 10 years. But all that new soil that you’ve created will be great for piling up on your new hugelkultur!
Our climate is quite rainy in the winter and dry in the summer. During the rainy season I love to think of the wood soaking up and holding onto all that moisture, ready to supply water to the plants in the summer. And while it’s breaking down, it is building amazing fertility as well.
Shallow or deep, above ground or below ground, big or small: there are many ways to incorporate hugelkultur principles into your growing system. Even putting smaller chunks of wood into the bottom of pots will help with water retention and fertility. And we used them in the greenhouse beds as well.
The general rule of thumb regarding hugelkultur is that it takes three years for them to reach their peak, retaining huge amounts of water, and releasing optimal amounts of fertility. So it will still need some watering in the first couple of years. But that doesn’t mean that the first two years won’t be great. It will start out good, and just get better and better.
Here are some illustrations to show what the different styles of hugelkultur can look like.
How to put a hugelkultur together
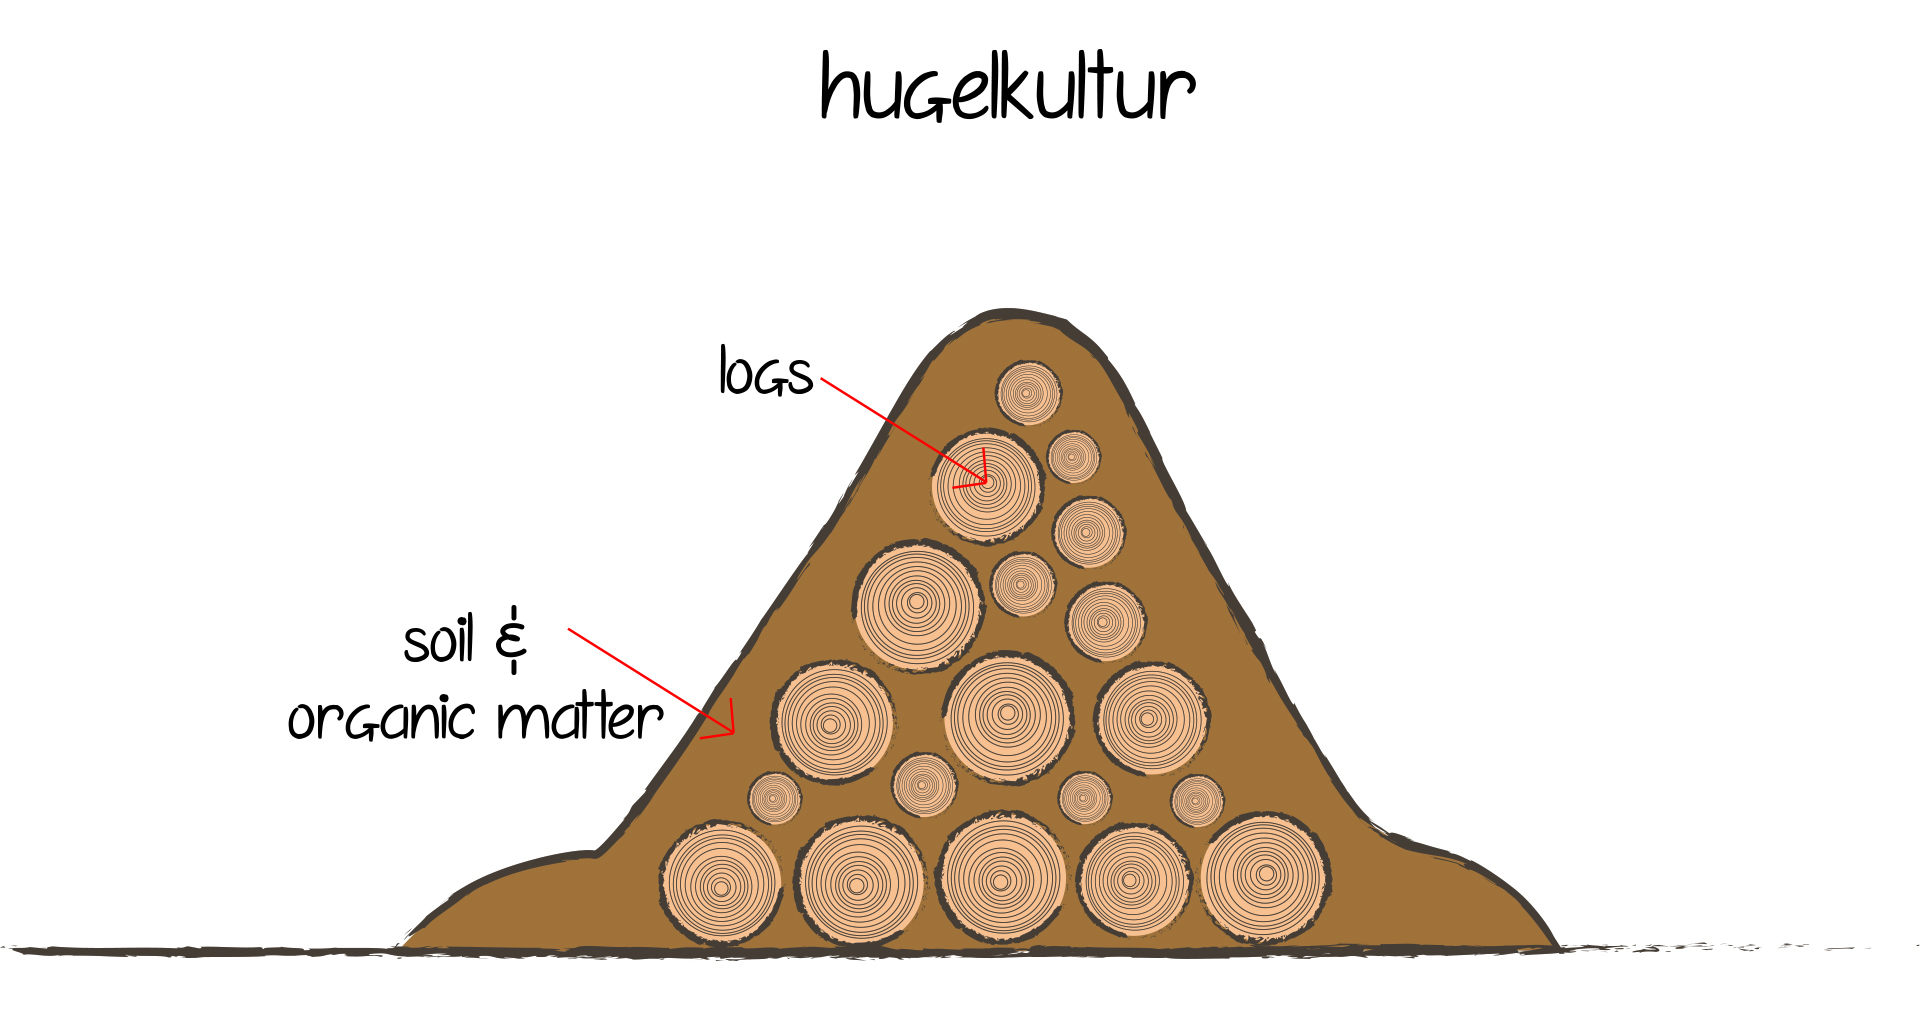
The basics of hugelkultur are quite simple – pile up some logs, add a layer of soil and/or organic matter, pile more logs, add another layer of soil and/or organic matter, and so on, until it’s the size you want.
But if you are in the situation I was in – basically having sand and no soil – you will need to have something to cover the logs with. I used year old wood chips, grass and weeds, and sand. But you could import soil from elsewhere if you want to.
Something to remember as you put your hugelkultur together: you really want to make sure that there aren’t any gaping holes between the logs. Fill in as much as you can between layers of logs. If you don’t, it will settle a lot in that first year. Also, if there are big gaps, the plant roots won’t like that at all.
How to plant hugelkultur
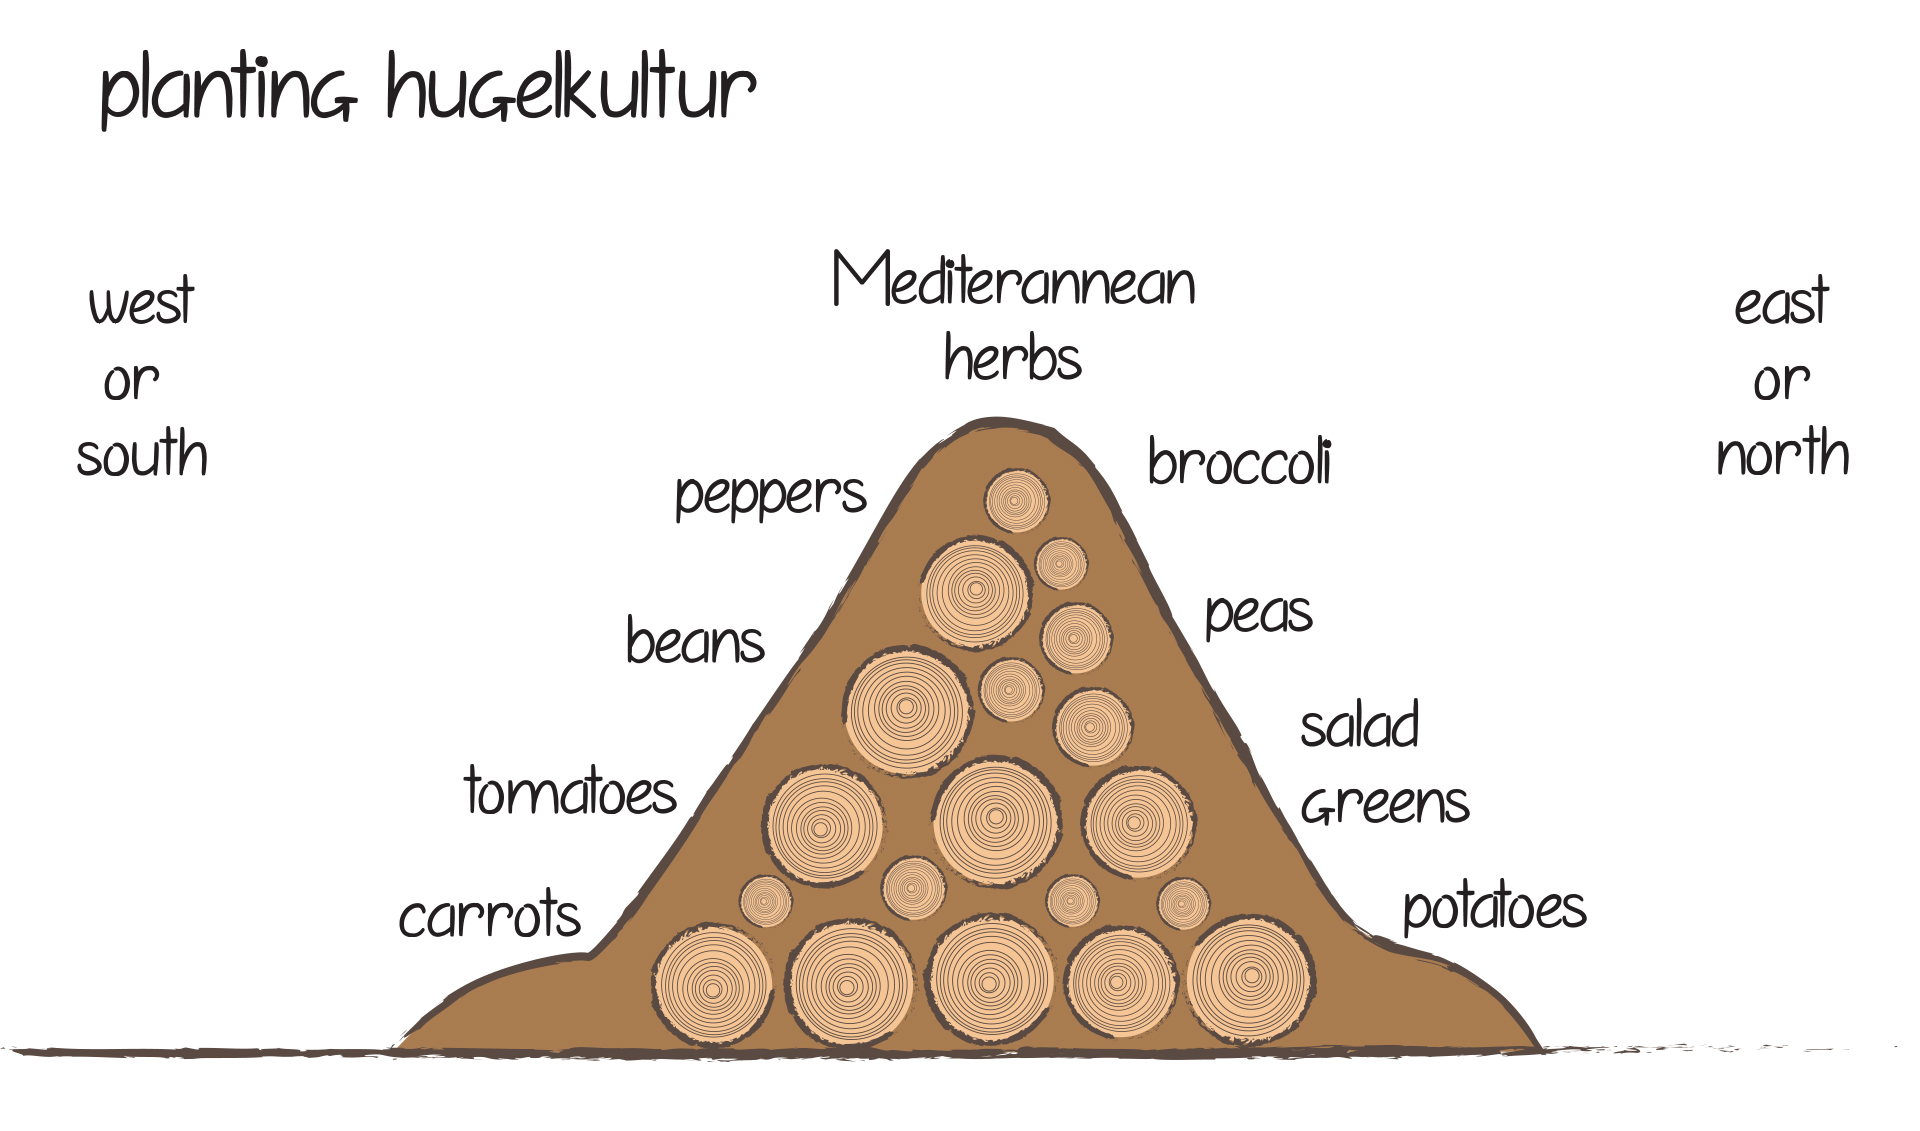
Planting a tall hugelkultur is a little different than planting a regular garden. There are many microclimates that you can take advantage of for growing different veggies.
Depending on how you orient your beds, you will probably have hotter sides and cooler sides. This is a great way to figure out what to grow where.
There are many vegetables – especially greens – that prefer a cooler climate. These are usually grown in the spring and fall. If grown in the summer, they have to be harvested quickly, before they go to seed.
But if you have a spot that gets some nice shade in the afternoon, you can keep it growing longer in the hot season. The north side of an east-west oriented bed is the perfect place. It’s also a good place for peas – their roots will stay cooler, which they prefer, while the plant reaches for the sun.
Tomatoes, peppers, squash, and cucumbers will love the sunny south side, toward the bottom where there is more moisture. At the top, where there is less moisture, you can grow Mediterranean herbs such as rosemary, sage, and thyme. They will love it up there.
In the mid sections, you can grow the rest of your veggies, herbs and flowers.
Some things might be a little trickier to grow. Potatoes need fairly deep soil to grow in – or they need to be hilled up – so you might need to find where there are deep pockets of soil to plant in. Or plant them on the ground at the base of the hugelkultur. Same with carrots.
Turnips, beets, rutabagas, and onions grow just below the surface, so they don’t need as much soil to grow in.
It might take a little bit of experimenting, but you’ll find the places where each plant will grow happily. And if you plant veggies and herbs that are either perennial or self-seeding, you’ll have less and less work to do each year
Pile it high!
There is a lot to be said about hugelkultur, and a lot I still don’t know about it; but I think it is a great technique for many situations. However, like anything, not all forms of hugelkultur work for all people in all situations.
For instance, in an arid climate, you might want to put your wood in trenches in the ground. An above ground hugelkultur could dry out quickly, unless it is a really massive one. So think carefully about your climate, soil and water situation, and then you can decide if hugelkultur techniques are appropriate for you.
There is a whole forum on permies.com – a massive permaculture forum – dedicated to hugelkultur. So take a look through the different conversations there and see if you can find the answers to your questions. If not, just ask. They are a pretty friendly bunch over there. (You can find me there too!)
And if you’re interested in reading a book by the King of Hugelkultur, as well as an amazing permaculture grower, you can’t go wrong with Sepp Holzer’s Permaculture: A Practical Guide to Small-Scale, Integrative Farming and Gardening.
I hope you enjoyed this introduction to hugelkultur. If you have questions or comments, please leave them below and I’ll answer you as soon as possible.
Health, Hope & Happiness
Tracy

Not a much of gardener myself but your article got me interested in trying hugelkultur. We do have a big backyard and I think this would be good idea for long term improving fertility. I love the idea of planting veggies on the bottom and herbs on the top. This would be an exciting project. Can’t wait to look into it further. Do you recommend any particular kind of soil to use for layering? Thank you so much.
Hi Pranali
I’m glad you enjoyed learning about hugelkultur. It really is a great way to add an interesting looking garden to your yard. And it is extremely low maintenance. I hope you have the chance to put some of these techniques to use.
Whatever soil you have access to will work fine. You can add amendments to it. My favorite amendment is a good quality compost. This can be added with the layers, and then put on the outside of the hugelkultur. Keep adding compost each year, and the soil below will get healthier and healthier.
Cheers
Tracy